
It seems like revival of 80s retro game and PC is global common trend among the limited cluster. The one enthusiastic item there is Sharp X68000. Unlikely other Japanese retro PC as NEC PC-9801, this machine is pretty exceptional one as if 80's edition of Amiga + Silicon Graphics.
BIOS and system disk of X68000 is now free publicity. An user can emulate X68000 on PC with them. I posted its installation guide before*1 and found some non-Japanese readers refer it with translation.
This post is its English translation, which introduce process for XM6g, the emulator of X68000 to
- run X68000 EXPERT
- install Human68K to HDD
- install SX-WINDOW to HDD
- runX68030
Preparation
Download following data from the next site.
| XM6 | emulator |
| XM6 utility | for generate required ROMs |
| IPL-ROM | ROMs for X68000 series |
| Human68k | CUI system disk |
| SX-WINDOW | GUI system disk |
| retropc.net | retropc.net |
Deploy downloaded data to appropriate folders. Deployment in this post is
| C:\myapp\XM6\ | 64bit xm6g.exe ROM (DATA file) |
| C:\myapp\XM6\HDD\ | HDD images (HDS file) |
| C:\myapp\XM6\Human68k\ | XM6Util.exe Human68k disk images (XDF file) |
| C:\myapp\XM6\SX-WINDOW\ | SX-WINDOW disk images (XDF file) |
Downloaded XM6 includes the X64 folder. It corresponds the folder "C:\myapp\XM6" above".
Although IPL-ROM varies from models, ROM for X68000 EXPERT is commonly required regardless of models. Example, to run X68030, user must put ROM for X68030 and EXPERT on the XM6 folder.
X68030 doesn't recognize SCSI somehow. Regarding HDD installation described later is not applicable for X68030.
XM6 has no English menu and this post shows its menu item without English translation.
XM6 utility
Run XM6 utility after deployment of system disks. XM6Util.exe and Human68K disk image should be located on a common folder. 3 ROMs generated should be moved to the XM6 folder.


Install
install Human68K to HDD
Trace the file menu as following, generate SCSI HDD image. In this post, "SCSI-Human68k.HDS" is generated as 100MB HDD.
ツール > イメージ作成 > SCSI ハードディスクイメージの作成

And set options as
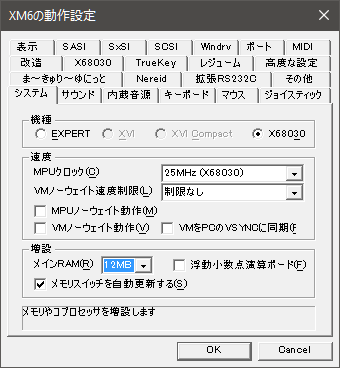
ツール > オプション
| システム > 機種 | check the model other than X68030 |
| システム > 速度 > MPUクロック | check the clock in accordance with the model |
| システム > 増設 > メインRAM | 12MB |
| SCSI > SCSIディスク > ドライブ数 | 3 mount "SCSI-Human68k.HDS" at ID0 |
 |
 |
Check Human68k disk image is inserted to A drive. Then, reboot (reset) XM6.
Run the format command after boot.
- formatコマンド
- SCSI装置
- ハードディスク
- 装置初期化
- 領域確保
- 容量=99
- ボリューム名=Human68k
- システム転送=する
- 実行
- format終了→コマンド画面へ戻る
- 次のコマンドを実行する。
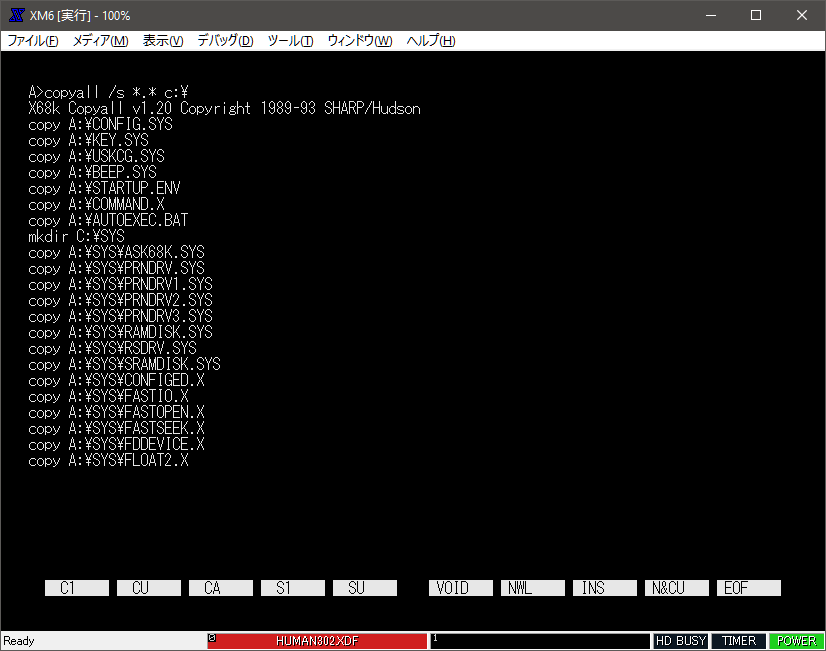
Remove disk from A drive, reset XM6. X68000 is booted with HDD.
copyall /s *.* c:\
 |
 |
 |
 |
 |
 |
install SX-WINDOW to HDD
Although install process until mounting HDD at ID0 is common for Human68k, only difference is to remake system disk for SX-WINDOW. Generate "SCSI-SX-WINDOW.HDS" as 100MB HDD at the HDD folder and mount it.
Reset XM6 after inserting "SXWIN311.XDF", the boot disk of SX-WINDOW to A drive. From now, operation is switched from CUI to GUI.
- F12 key switch initiative of mouse operation between Windows and XM6.
- Open context menu with right click
- Keep right click and release on an objective item
- Then, objective item is selected
Just after booted, A drive is opened. Format HDD
- run "HDフォーマット"
- select "SCSI0 ハードディスク"
- push "実行"
- push "はい"
- select "領域確保", and select "する" at "システム転送", then push "実行"
- push "確認"
XM6 is rebooted with SX-WINDOW boot disk.
- right click the icon "X" at the upper left corner, open C drive from "ドライブトレイ"
- "すべてを選択" select everything in A drive, and drag & drop them to C drive
- select "on" at "転送先にない", then push "実行"
- repeat for other disks of SX-WINDOW
- other disk should be inserted to B drive.
Right click the icon "X" and push "終了". Remove disks from both A and B drive after shutdown. Reset XM6, then SX-WINDOW is booted at HDD.
 |
 |
 |
 |
 |
 |
 |
run X68030
Copy ROM of X68030 to the XM6 folder. Leaving HDD mounted is no problem because X68030 doesn't recognize SCSI.
"ROM30.DAT" is required to boot X68030. This is 128KB binary file. To generate this file, run next PowerShell command at the XM6 folder.
Run XM6, X68030 is booted.
$data = New-Object byte[] 131072
Set-Content -Value $data -Encoding byte ROM30.DAT
📁 This is just for the reference about ROM30.DAT.
ROM30.DAT (ダミー) 生成
dd.exe と SCSIINROM.DAT が置かれていることを確認して、コマンドプロンプト上で
C:\XM6i>dd if=SCSIINROM.DAT of=ROM30.DAT bs=128k conv=syncとしてダミーの ROM30.DAT を生成。 (SCSIINROM.DAT の後ろをパディングして 128KB にしているだけ)
NetBSD/x68k on XM6i 0.30 - クロスプラットフォーム X68000/X68030 エミュレータ
Check options.
ツール > オプション
| システム > 機種 | X68030 |
| システム > 速度 > MPUクロック | select clock in accordance with the model |
| システム > 増設 > メインRAM | 12MB |
 |
 |
SASI HDD
SASI HDD has following assumption and constraint.
- only for X68000 EXPERT
- max capacity 40MB/drive
- not for boot drive
In short, SASI HDD is just data storage only for X68000 EXPERT. Other than exceptional case, it is not required as long as SCSI HDD is available. Exceptional case is the scene that XDF file as disk image is required.
| HDF | SASI disk |
| HDS | SCSI disk |
As well as in SCSI case, process from generating to mounting is almost common.
ツール > イメージ作成 > SASI ハードディスクイメージの作成

ツール > オプション
| システム > 機種 | EXPERT |
| システム > 速度 > MPUクロック | clock in accordance with the model |
| システム > 増設 > メインRAM | 12MB |
| SCSI > SCSIディスク > SCSIインタフェース | 装着しない |
| SASI > SCSIディスク > ドライブ数 | 1 mount generated XDF file |
 |
 |
 |
Partitioning ("領域確保") is done with "formatコマンド" in case of Human68k, and with "HDフォーマット" in SX-WINDOW case. System transfer is not required because it can't work as boot drive.
 |
 |
 |
 |